We took the ever-popular door jumper rig to new heights- literally!
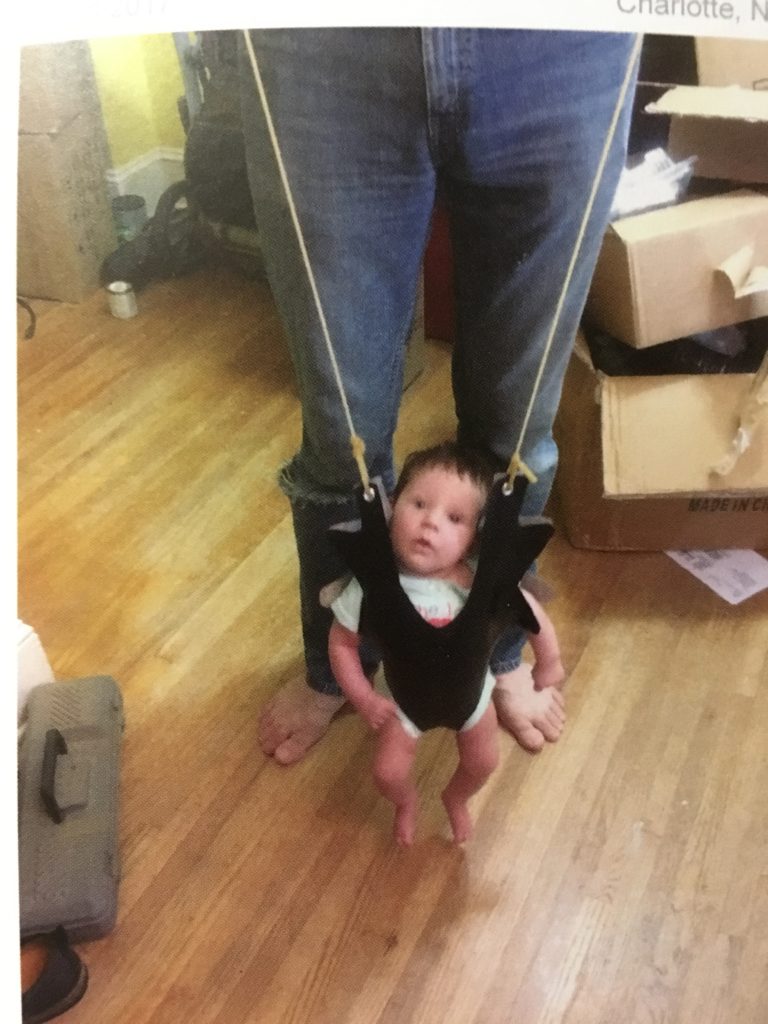
This one’s pretty easy once you get your mount secured. That’s the harder part. For this to be simple and effective you want as high a tether point as possible. Ideally you will stretch out your bungee cord to its highest point of elasticity and then your participant’s toes will just barely touch the ground when things are cinched up. You will also likely want a spreader bar high up near the top point so that your lines aren’t all converging into your participant’s head. This also helps with stability and reduces twisting up.
You will want a bar that’s lightweight so that it’s less of a hazard if it were to come falling down but still rigid enough to avoid collapsing. A simple wood 1″ pole is probably about right. You can scale this down accordingly with your rider if you prefer.
Anyway, so I used my motorized tethered crossbow rig- the same one I use for drone retrieval briefly documented here. I also sometimes use an air powered cannon with tethered rubber dog toy- usually for lower altitude pursuits and tree trimming. A heavy rubber ball is a good projectile because its good at getting where it needs to, will carry a good bit of heavier line, and won’t likely injure anybody if you get hit with it. The crossbow has an assortment of projectiles that increase in order of pain and suffering along with the required height/tether required. Anyway- figure it out and get a line over a very high branch or other suitable tether point. After you get a thin line, you can use that to draw heavier duty ropes up there.
The first one I made was actually indoors. I opened the attic access panel/stairs and tethered my kid to the roof joists via elastic tubing. This was a good start and particularly practical on those rainy days!
This evolved into a few iterations with a metal bar frame. As she grew into a toddler, I eventually fabricated a form fitting harness.
The original had 3 lines with the center going to a lower spreader bar which also featured a shield so that if anything were to go wrong, nobody would get snapped in the head with a giant rubber band or falling thing. The center connection point allows for some horizontal balancing of the harness. Speaking of which here is the most important detail of this guide:
Make all the tether connection points above your rider’s head. This low center of gravity is key to the whole plan- especially the safety.
I secured a winch rated pulley via a 500lb rope to the main branch. This pulley operates a separate rope that raises and lowers the system.
Since most of the time we’re talking about a 20-30lb kid, I just operate this rope by hand. Just be sure to secure the end so that if it slips or something, things stop before getting dangerous. I actually have another one made for grownups that uses a modified climbing harness and industrial bungees. That one connects to a tree mounted ATV winch, but if I had this to do over, I would use something with way less gearing (although I’m not using the winch motor). This works pretty well for some family-jumping
Most recently we realized the joy of “augmented” jumping- that is, adding some extra tension through the pully & dadddy power. Of course at this point, D insists on harnesses for all..
Too small, hard to see. Barely can mske out person.