Colors are a little tricky. You’ve seen those filters at the average kids museum that illustrates that yellow and blue make green by overlaying acrylic shapes, but in that example you’re just filtering white light and so reducing the output. If you stack all the filters you don’t really get white light, you get some muddled shade of brown. It’s similar to pigments in that way because you’re more mixing colors than producing a light.
I wanted to reverse that to help eliminate some of the ambiguity, and so went with an Arduino nano and 3 potentiometers. If you want a thing that just cycles through colors that’s easy enough and you could do it with a single pot, but if you want something that’s more representative to a typical trichromatic human eyeball, then you just have Red, Green, & Blue to work with. This setup works out pretty well with a single NeoPixel to output the light. Basically turning each dial just raises the intensity of each color- when they are all maxxed out you end up with a nice, white light.
This leads to fun conversations about rods & cones- tetrochromacy, and assorted bugs and other creatures who see lots more colors than we can.
This was more popular when she was younger, but I found it in the toybox today, and I have the files, so here it is, on the site.
**Also- I actually updated the code to make this a practical tool in addition to a toy for Del. Occasionally, I have clients that are particular about a color they want represented in light for some purpose, or I want to dial in a particular setup myself. I can do that using this exact system and then plug this into a USB port. It will the read out specific tuned values per each color that I can reference moving forward. If I think up some other program I want to load in this, that’s easy enough too.
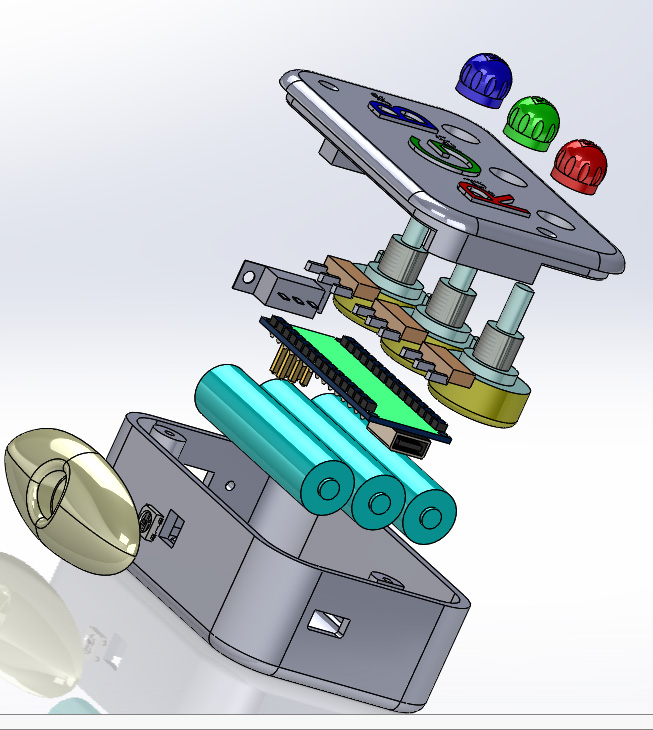
Ingredients:
1- ‘Neopixel’… I used an off brand, these seem to work just fine.
1- Arduino (I used a nano) or similar
3- AAA batteries (or 1 lithium).
3- potentiometers (I always have a supply of these)
1- slide switch
1-program.
*Optional: a little fiber optic bundle adds some visual fun. Del likes to put those little feelers underwater to light up the tub or whatever. I have to admit that’s a pretty cool effect.
I made this CAD in a hurry, so print at your own risk- it will need a little dremeling & improvisation to fit just right, but its better than nothing.
Its actually sized to fit some broken off piece of toy optic that you might find at a carnival or whatever, but we lost that so I made another quickie by sticking leftover fibers from our starfield into a ring and then sanding it flush. Kids love fiber optics!